Connect a GIS View to QGIS
This workflow explains how to connect a GIS View to QGIS and work with live spatial data from the application.
Once connected, QGIS behaves as a read-only client that reflects the current state of your data — no exports, no syncing, and no duplicate datasets.
Before You Start
To connect to QGIS, you must already have:
- A GIS View created
- At least one GIS Layer added to that view
- Permission to access GIS outputs
If you haven’t completed those steps yet, start here:
Mental Model
Think of QGIS as a window into your data, not a copy of it.
Application Data ↓ GIS Layer (query + joins + geometry) ↓ GIS View (grouping + permissions) ↓ OGC URL ↓ QGIS (read-only)
Refreshing a layer in QGIS simply re-queries the source — nothing is stored locally unless you explicitly export it.
Step-by-Step: Connecting a View to QGIS
1️⃣ Open the GIS Views Page
Navigate to the GIS Views page in the application.
Select the view you want to connect to QGIS.
2️⃣ Locate External GIS URLs
With a view selected, the External GIS URLs panel appears.
You will see:
- An OGC API landing URL
- A collections URL
- Individual layer item URLs
These URLs are generated automatically and reflect the view’s current configuration.
3️⃣ Copy the OGC API Landing URL
Copy the OGC API landing URL.
This is the recommended entry point for QGIS.
Tip
You usually only need the landing URL — QGIS will discover layers automatically.
4️⃣ Open QGIS
Launch QGIS Desktop.
This workflow assumes QGIS is already installed and configured.
5️⃣ Add an OGC API Connection
In QGIS:
- Open the Browser Panel
- Right-click WFS / OGC API – Features
- Select New Connection
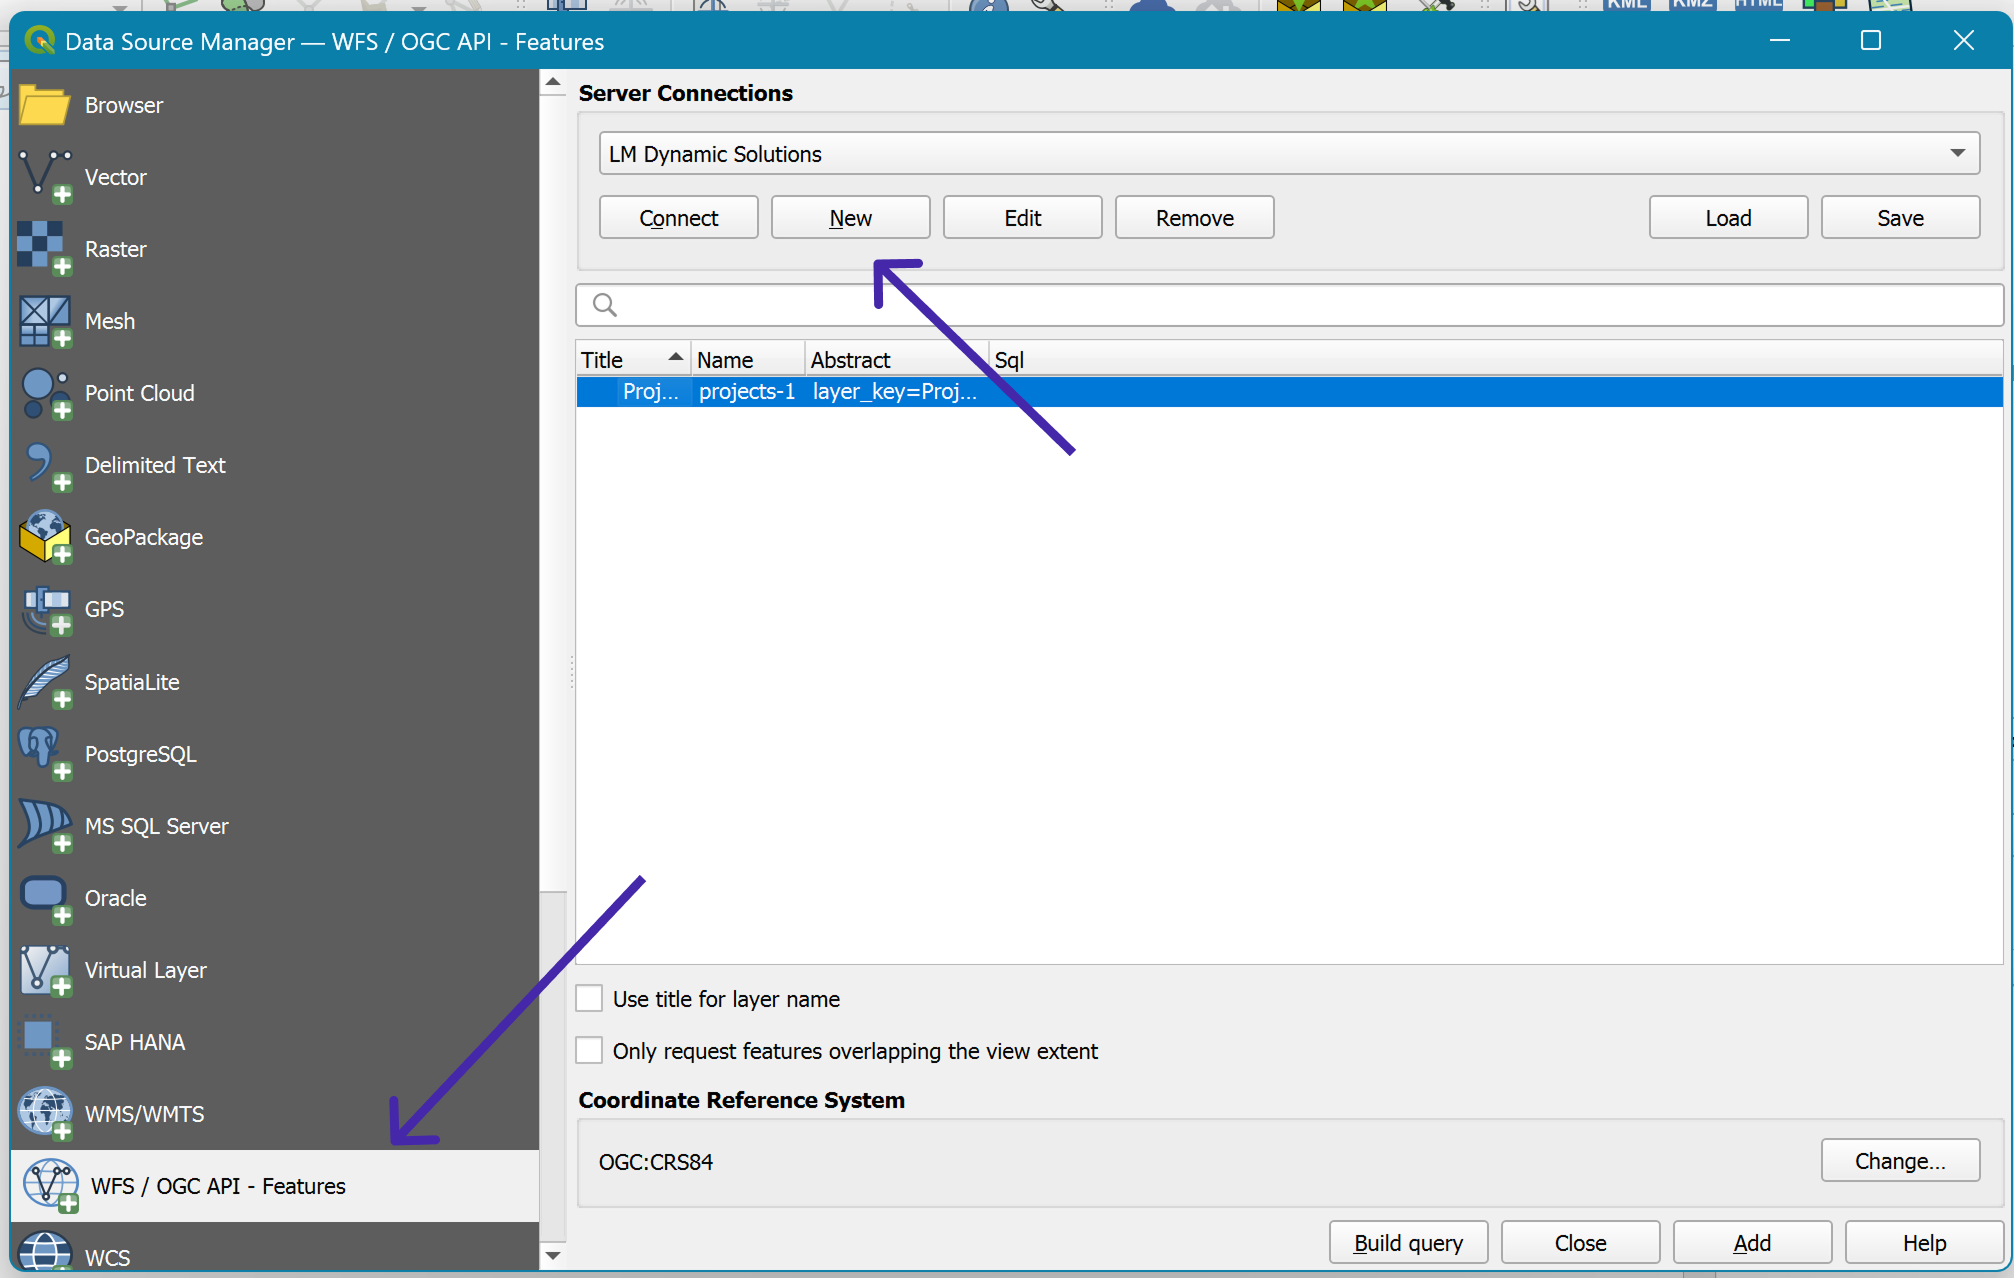
This opens the Modify WFS Connection dialog.
6️⃣ Configure the Connection
In the Modify WFS Connection window:
- Name: Enter a recognizable name (for example, LM Dynamic Solutions)
- URL: Paste the OGC API landing URL from the GIS Views page
- Authentication: Leave set to No Authentication
- Version: Select OGC API – Features
All other options can be left at their default values.
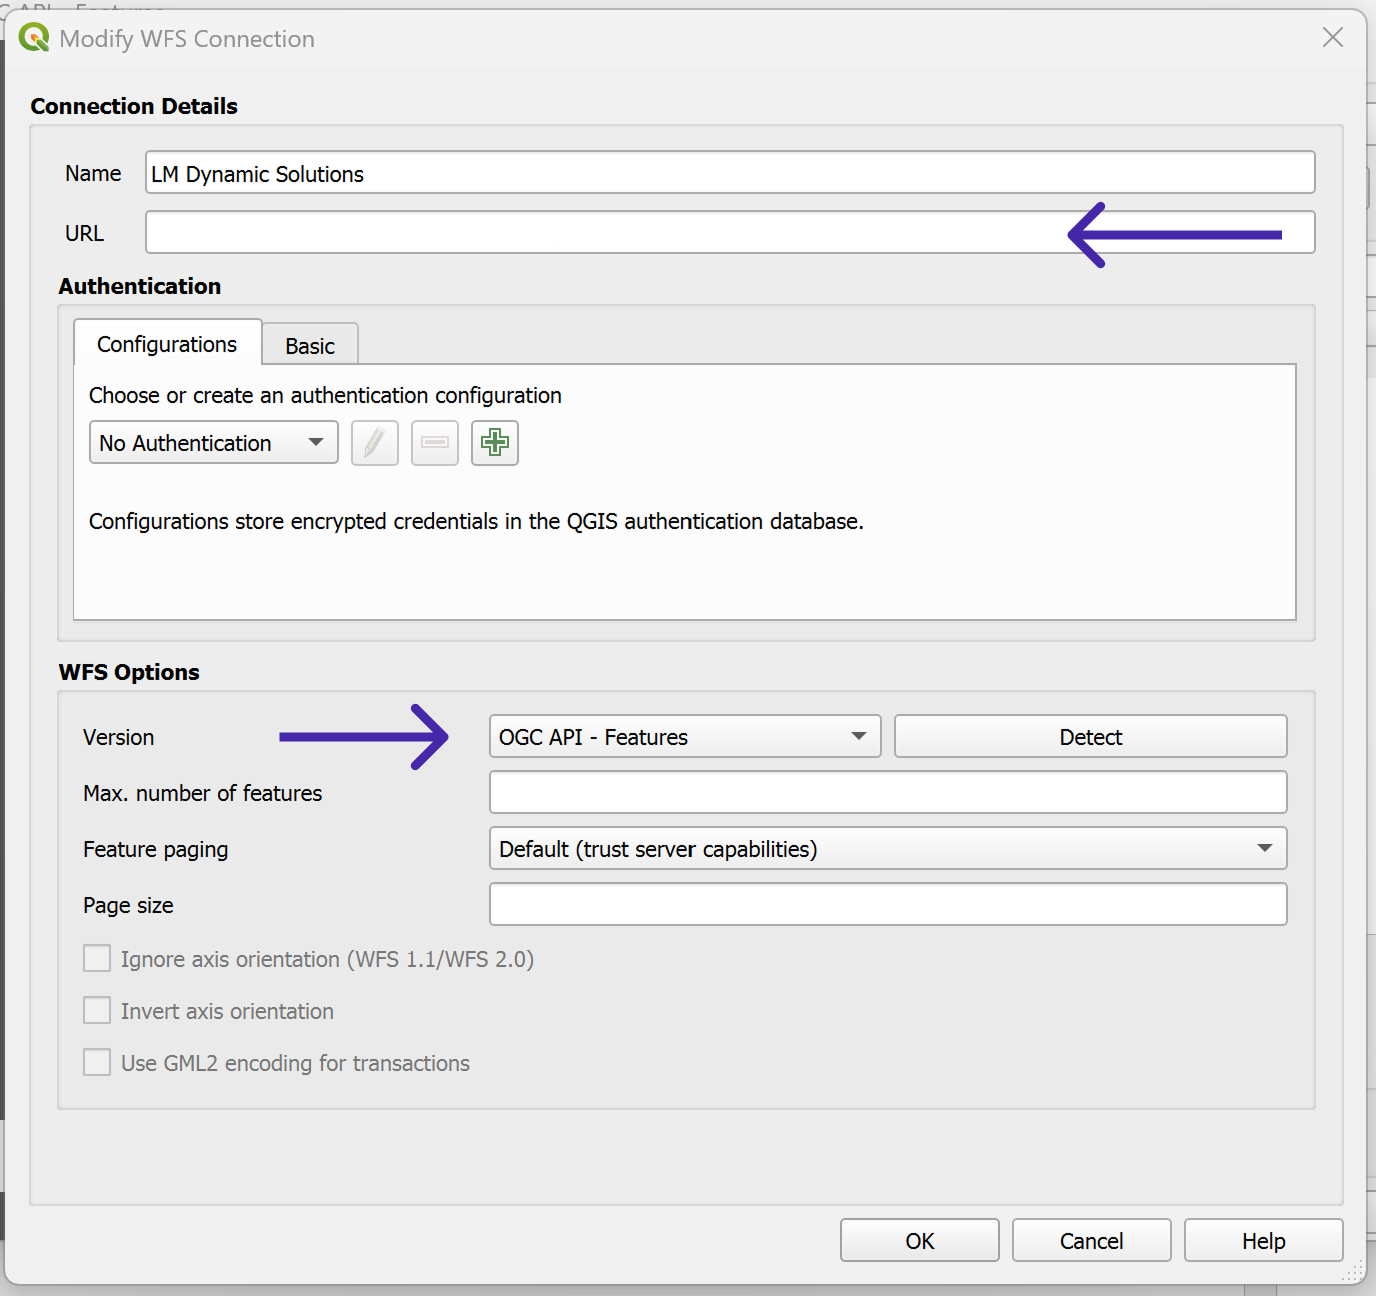
Click OK to save the connection.
QGIS will query the endpoint and discover available collections (layers).
7️⃣ Load Layers into the Map
Once connected:
- Expand the new OGC API connection in the Browser Panel
- Browse the available layers
- Drag one or more layers onto the map canvas
Each layer corresponds to a GIS Layer defined in the selected GIS View.
Working with the Data in QGIS
Read-Only by Design
All layers are read-only.
This is intentional.
- Editing is disabled
- Deleting features is not allowed
- Attribute changes are blocked
To modify data:
- Make changes inside the application
- Refresh the layer in QGIS
Refreshing Data
To refresh data in QGIS:
- Right-click the layer
- Select Refresh
This re-runs the underlying query and reflects the latest data.
Styling & Analysis
You may safely:
- Apply symbology
- Label features
- Run spatial analysis
- Create layouts and exports
Styling changes exist only in QGIS and do not affect the application.
Performance Best Practices
For best results:
- Load only the layers you need
- Avoid styling very large datasets at once
- Use view-level filtering when possible
- Prefer multiple focused views over one massive view
If performance is slow, consider:
- Reducing selected columns
- Narrowing geometry scope
- Creating a GIS-specific view
Common Issues & Fixes
No Layers Appear
- Confirm the view has at least one layer
- Verify permissions
- Refresh the connection
Geometry Does Not Display
- Check which geometry column the layer uses
- Ensure geometry is valid in the source data
- Confirm the correct layer was added
Attributes Missing
- Verify the layer’s selected columns
- Confirm joins are configured correctly
- Refresh the layer
Security Notes
- URLs respect the view’s share scope
- Data is scoped to your organization
- No write access is ever granted
Treat GIS URLs as controlled access points, not public exports.
What Happens If the View Changes?
If the GIS View or its layers are updated:
- URLs remain valid
- Available layers may change
- QGIS will reflect updates on refresh
This makes GIS Views safe to evolve over time.
What’s Next?
At this point, you have completed the full GIS workflow:
- Created a GIS View
- Built one or more GIS Layers
- Connected the view to QGIS
You can now:
- Share live GIS data
- Produce engineering exhibits
- Perform spatial analysis
- Export final deliverables
For reference:
Summary
Connecting a GIS View to QGIS provides live, structured, read-only access to your application data.
It eliminates exports, reduces duplication, and ensures everyone works from the same source of truth.
Think of QGIS as a viewer and analyst, not a data editor.